DislikedYes,I did and looking at where price is now,I can only scratch my head and look for another setup.On the other hand thanks for the very insightful analysis from the weekly emails and for the time that you put into this.Ignored
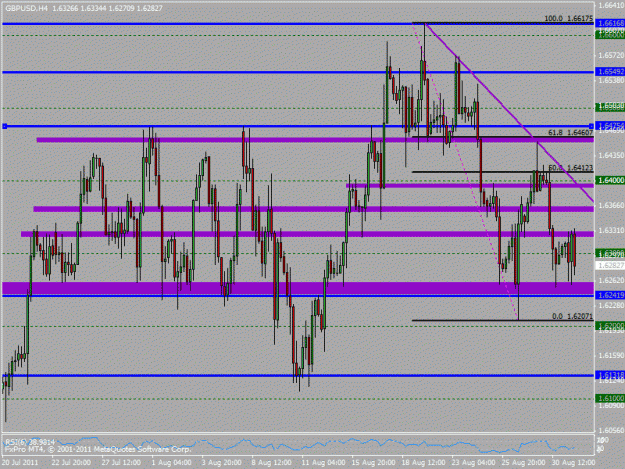
Take the GU trade, whe price reached that trouble area you cannot know what price will do next, it's a 50:50 probability that price will either bounce and come back to hit your entry area or push down through without coming back. But you have no way of knowing as there is no information to tell us either way. So in a situation like this I know I don't want to take a loss from hereon so at the minimum I'll move to BE and sometimes I might take some profit but I will very rarely not leave some of the trade still open - why, because I know most of my account growth every month doesn't come about from taking full profit at every first trouble area on a trade it comes about because from the runners I manage to catch.
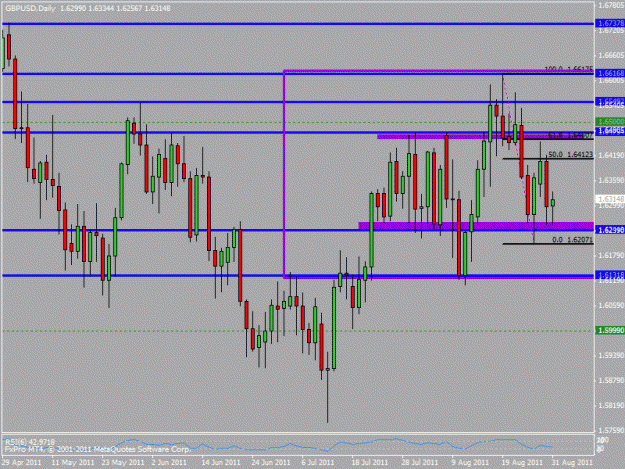
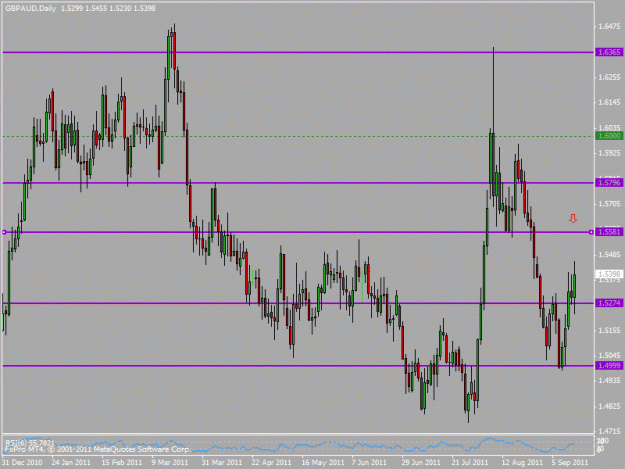
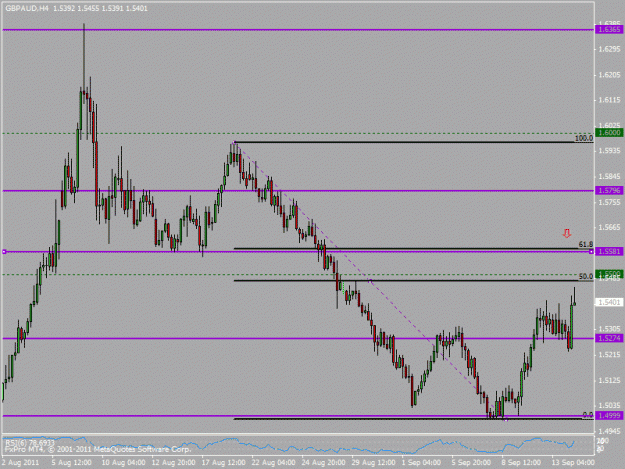
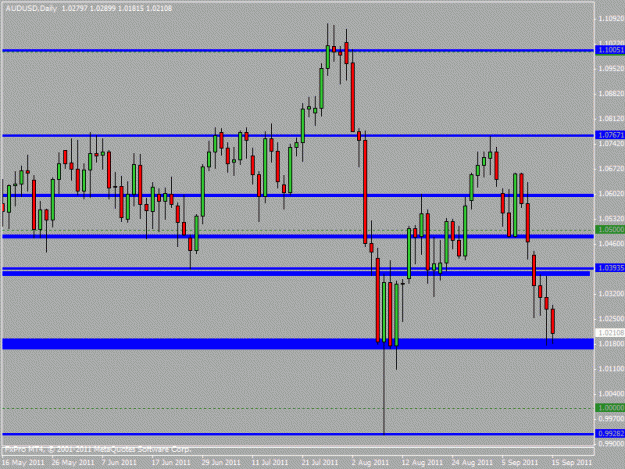
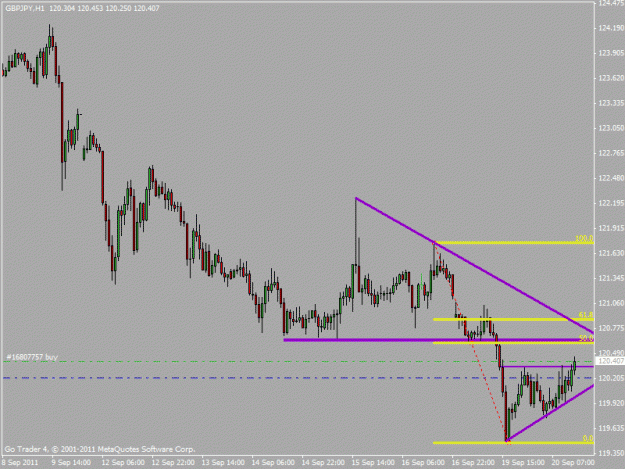
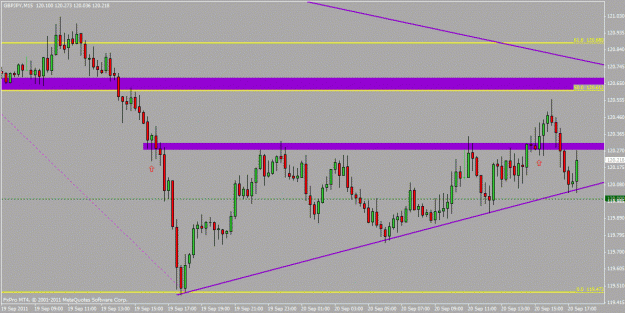
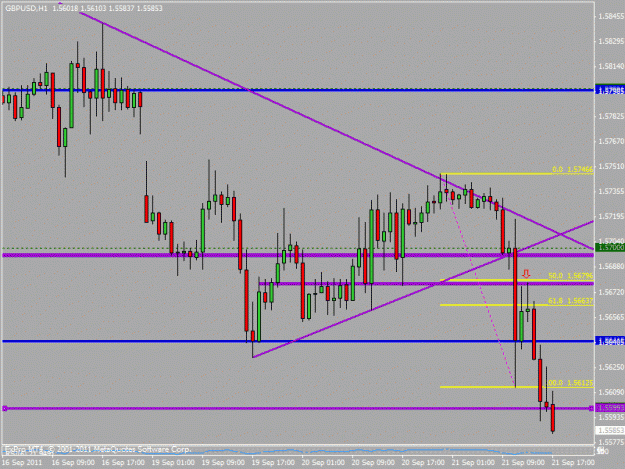
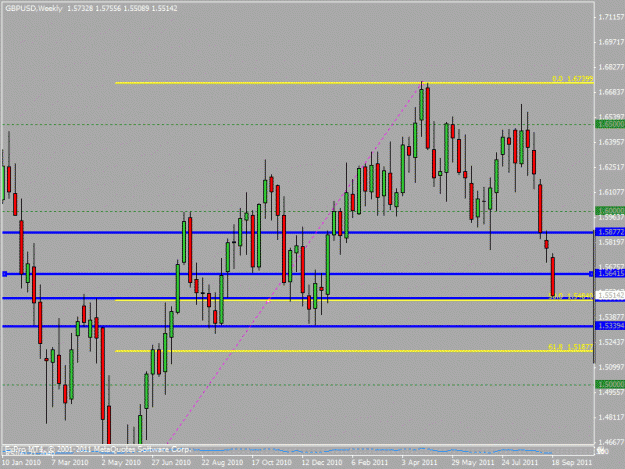
When I look at the GU daily chart I can see it's in a range as per the large box and a smaller range highlighted with the 2 purple rectangles. On the 4HR chart where the trade setup occurred I would always want to leave some of my trade open when faced with a situation where it's 50:50 what price will do at an S/R area.
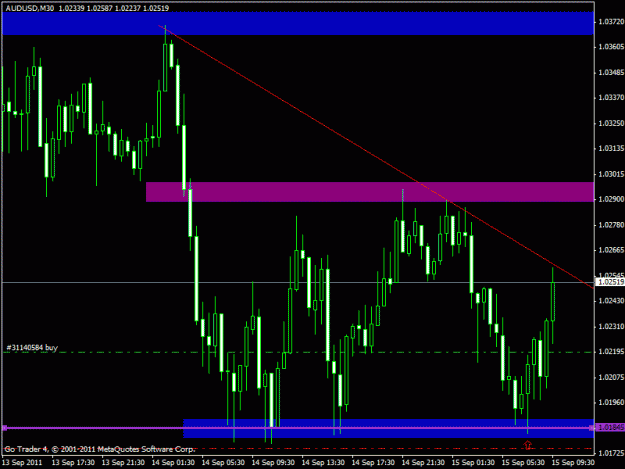
In this case price pushed down forming a 4HR BEOB. In doing so it broke through another potential 4HR support area so I would be moving my SL above this area as I would be expecting it to act as resistance to price going forward. The 4HR BEOB is a signal that price is now more likely to push lower to the bottom of our smaller daily range and it's also an opportunity to potenitally add another position.
Price then reaches the target area...now this is a daily support area and the bottom of a range and we can see how strongly it's rejected price in the past. I would defintely not want to take a loss on BEOB + remaining TT position so I'd either move my SL above the high of the bar after the BEOB (i.e. above resistance) or take some profit here...either way the combined SL on the TT and BEOB trade would be at the same area.
Now I would be watiing for more information from price before deciding what to do next, either my SL would get hit or price will break the daily range low and close below it allowing be to move the combined SL lower.
So at the moment if taking 50% profit at the trouble area identified on the TT and 50% on the BEOB at the range low I would have the following positions and profit:
TT:
Entry @ 1.6450, SL @ 1.6480
Exit 50% @ 1.6400, SL on remaining 50% @ 1.6345
BEOB:
Entry @ 1.6320, SL @ 1.6380 (I would put the SL above the resistance and not the bar high - putting it above the bar high decreases your %R without materially decreasing your risk of a loss).
Exit 50% @ 1.6260, SL on remaining 50% @ 1.6345
Therefore I've banked 1.33R and have +1.37 on open positions and thus a combined +2.7R compared to +1.7R if I took full profit at the first trouble area and I still have the potential to make more if price breaks the range low.
Thus by banking some profit at the first trouble area and leaving the other half until you get more information on where price is heading next and acting accordingly is how you can make some serious gains every month.
Attached Image(s) (click to enlarge)