No problem Ir1sh, it's great to debate setups and see everyones opinions.
Firstly this bar is still forming, but I'll assume it's now a closed bar for arguments sake.
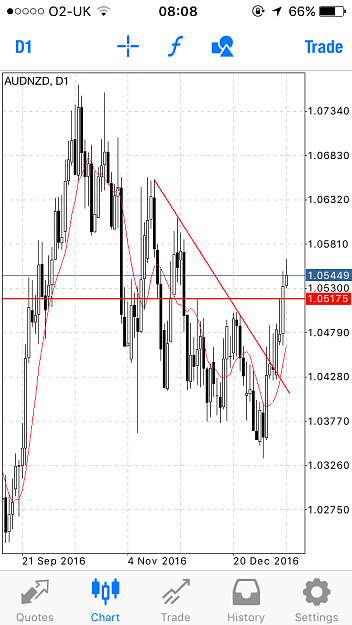
The NZDUSD setup is at an extreme, (space to the left) following a 'final' push up, often used to trap before a drop in price (I won't go into detail about that), the EURZAR bar has formed right in the thick of what's more or less a sideways movement.
There's nothing to say a BUOB won't work where it is, you've identified some confluence, if it broke those previous highs there would be a better chance of it being a reversal, personally with price as is I'd prefer to look for a sell at the flip zone and a continuation lower.
Saying that if you were to take the trade the most important thing is managing it (especially in a tight space), you have to have identified pre defined areas where you're going to move your stop and/or take profits etc
Probably not explained my reasoning very well (that's why I prefer to post pictures).
Firstly this bar is still forming, but I'll assume it's now a closed bar for arguments sake.
The NZDUSD setup is at an extreme, (space to the left) following a 'final' push up, often used to trap before a drop in price (I won't go into detail about that), the EURZAR bar has formed right in the thick of what's more or less a sideways movement.
There's nothing to say a BUOB won't work where it is, you've identified some confluence, if it broke those previous highs there would be a better chance of it being a reversal, personally with price as is I'd prefer to look for a sell at the flip zone and a continuation lower.
Saying that if you were to take the trade the most important thing is managing it (especially in a tight space), you have to have identified pre defined areas where you're going to move your stop and/or take profits etc
Probably not explained my reasoning very well (that's why I prefer to post pictures).