Renko Bricks In Conjunction With Order Flow - A Work In Progress
Overview
Following RickM to a thread on Forex Factory, made by rockypoint, led me to the re-discovery of Renko Bricks and soon after I had the idea of combining a Footprint chart with a Renko Brick chart. This thread will be a compilation of everything from general testing, thinking, thorough analysis and trading of this new endeavour. Either using the already proposed strategy of trend trading Renko Bars closing over MA’s and having Order Flow as a filter / confirmation tool or a new/adapted strategy to play into Order Flow’s strengths we will find what's best.
I am doing little backtesting, instead forward-testing EURUSD/6E as it unfolds daily (If any Order Flow traders want to help with this effort or collaborate message me) while I trade my other strategies. For those new to 'Order Flow' here is a post I've made in the past, hopefully it can help form a foundation for further learning.
Looking over Renko Footprint Brick charts I have (so far) come up with several core uses this type of Renko-Volume analysis can provide, regardless of any specific strategy:
- The more effective analysis of set trading distributions (ranges) using the Renko Brick formation to remove the noise (remove excess candlesticks) to more easily see the forces at play (Volumes/Orders) within a consolidation period.
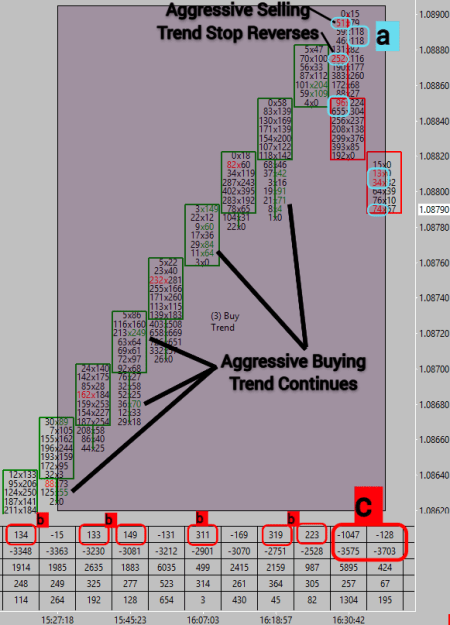
- The more effective analysis of the health and participation of a trend and the more accurate ability to see the volumes being transacted at specific important reversal points.
It is a new, often more effective, way of organizing mass amounts of price and volume data combined - Renko Footprint Bricks! The more I test and look into this the more intrigued I get and as such I am returning the favour of inspiration that I received from both RickM & rockeypoint back to the trading community by publicly learning and testing this new way to view Order Flow data. I am very interested to hear any ideas or findings by anyone who has tried/trying this, feel free to reach out!
Goals
- To use Renko Bricks to better visualize trends/ranges: The core point of Renko charts is to filter out noise and help traders to more clearly see the trend. With any introduction of Order Flow this must always be present in mind;
- To analyse volumes at specific moments before /during / after a trend;
- To test all aspects of using Order Flow with Renko Bricks;
- To start trading a Order Flow version of the original strategy;
- To improve and adapt the strategy further
Before we start diving straight into analysing the Renko Footprint Brick chart, let's get a basic idea of what the original Renko strategy (made by rockypoint) involves:
Specifications
- A hybrid Renko Brick-Heinkin Ashi Chart is needed with;
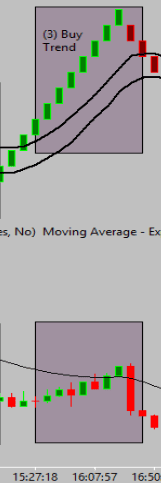
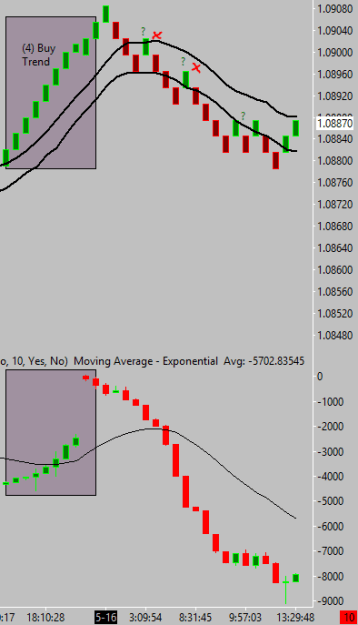
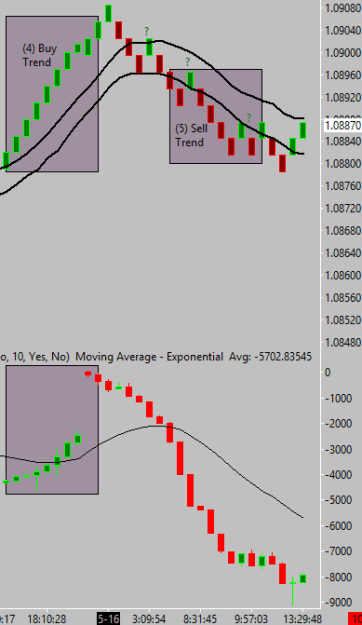
- Two 10-Period Moving Averages individually set to either High and Low of the Renko Chart price data. When a brick closes above the higher MA (in an uptrend) a long setup is appearing and vice versa for a short setup.
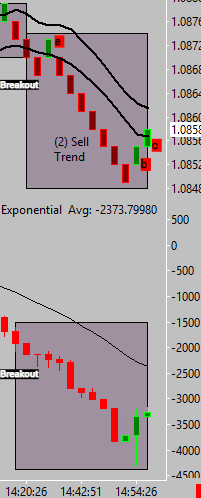
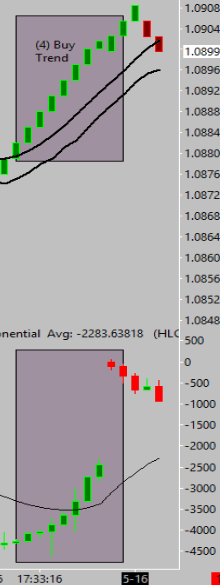
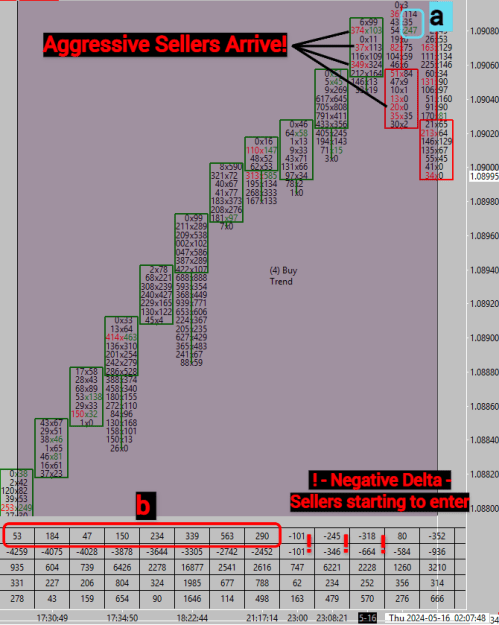
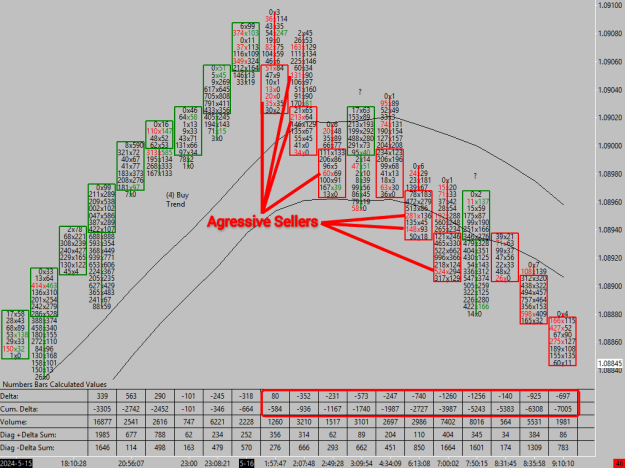
- A Cumulative Delta chart shown as candlesticks is used for confirmation of each trade setup. One 10-period HLC Avg Moving Average can be added onto this CVD chart as a reference and for comparison to price. If a Selling Renko Brick prints, you want to see an equally strong negative Cumulative Delta candle as well and vice versa. Deep Cumulative Delta Analysis can be conducted to support trade setups and entries/exits.
- Trail the trade (trend follow) until an opposite Renko Brick closes into the MA channel.
A custom Renko Footprint Brick Chart is needed to view the Volumes transacted and also the Bid x Ask Imbalances that took place within specific Bricks. The strategy above is not what is not important at the moment, the analysis of Order Flow which is soon to follow is what is. It is just to provide context to what we are about to look at and a means to use the tool often.
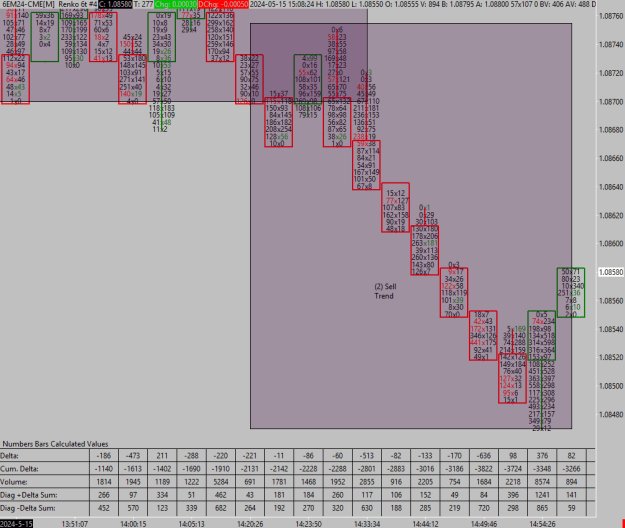
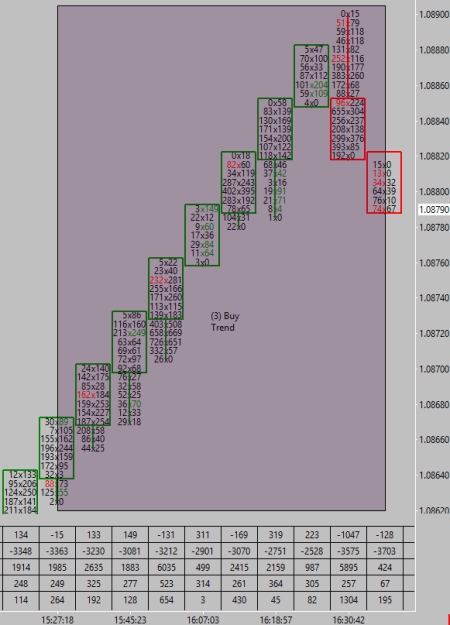
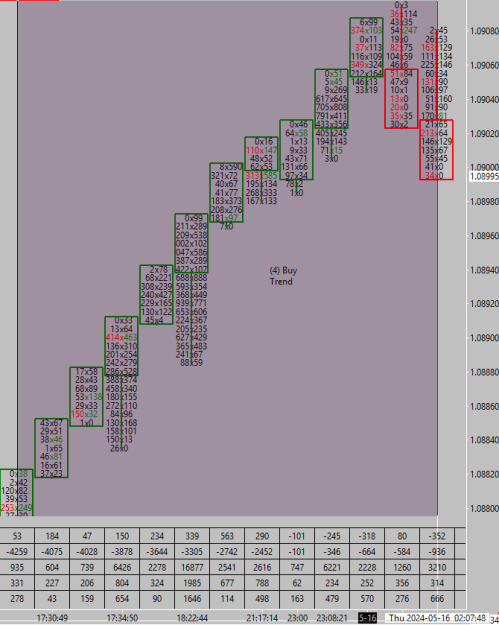
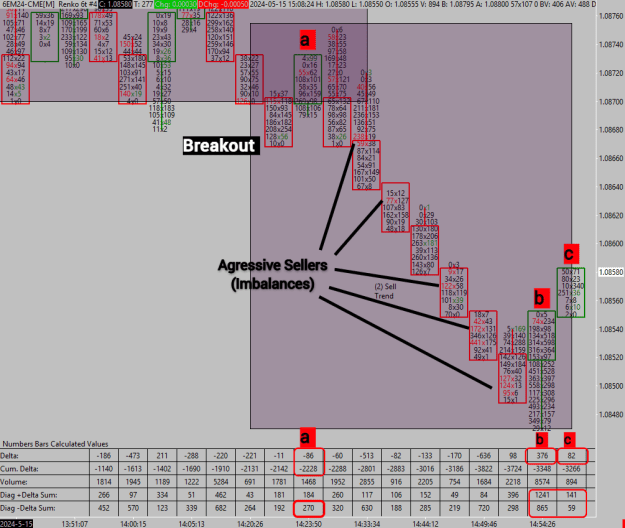
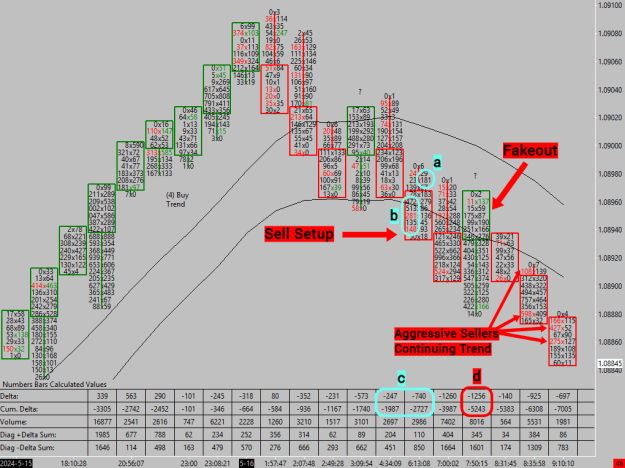
CASE STUDY & TEST: RENKO FOOTPRINT CHART BREAKDOWN

The above labelled (1-4) sections of trend/no trend Renko Bricks on EUR Futures (EURUSD) Wednesday 15th May 2024 will have their accompanied Renko Footprint Bricks below. I will lay them all out, then go back and fully analyse from 1 to 4: