Tear It Down 2

Dissatisfied with the results of the simpler idea, I added complexity in an attempt to 'improve' it. I did not succeed.
“Just when I thought I was out they pull me back in.”
Sonny Corleone
Principles
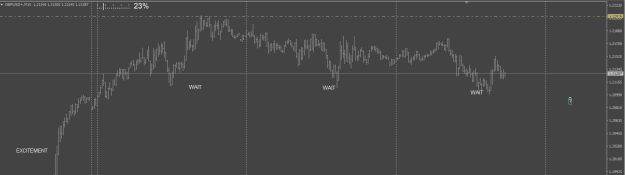
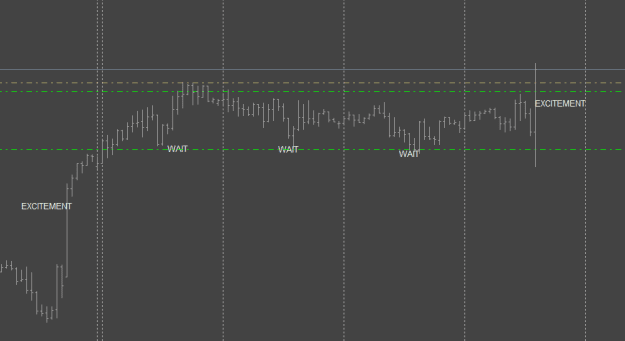
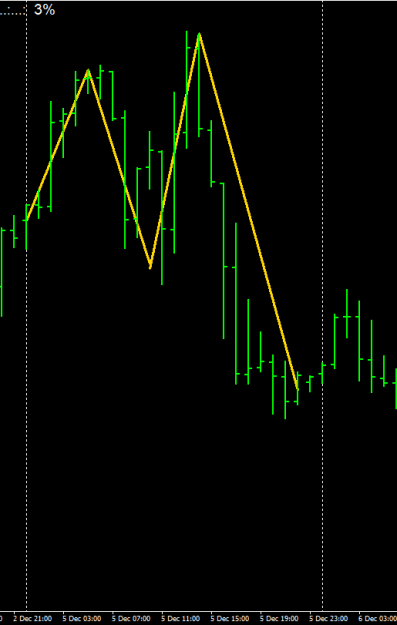
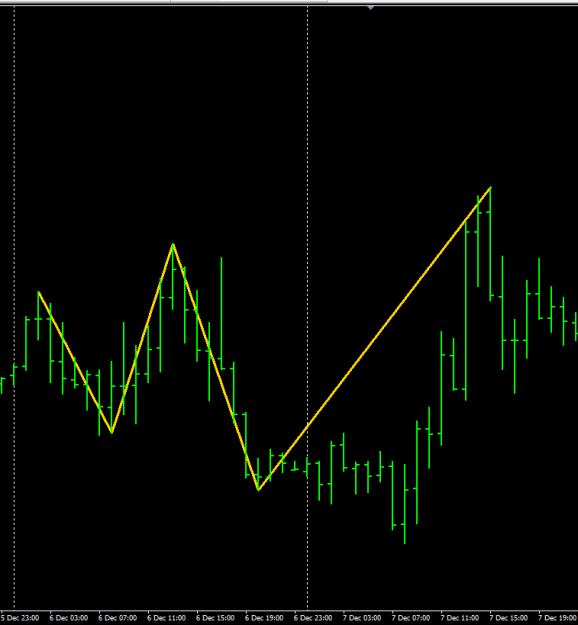
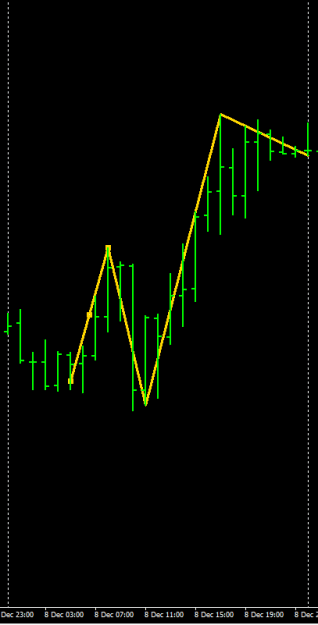
Simply, as soon as a big juicy bar goes up we expect price to retrace at some point to at least ~50% of that bar.
Indicators
BarTimer to measure time left in current bar.
SpikeBars 3.2 (paints the bar after close)
ThrustBars (signals immediately at threshold and paints the candle but will remove the flag if closing price is below the threshold)
Combine Thrust Bar & Spikebar indicators to flag and signal all big bars.
Jotun SMMA
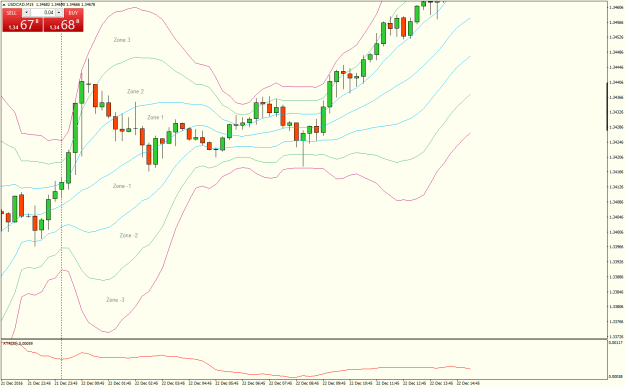
Use TMA envelopes & TMA slope to show where non-prodigals are most likely
Use TMA slope to help you decide when to let some trades run? Not this system.
Add and tune templates for as many instruments/TF as CPU can accommodate. Scan pairs, on M15/H1/H4(?)/D1(?); trade ones that aren’t correlated.
Entry:
Enter immediately after 80% barTimer on any signal that is opposite to what Jotun is flashing UNLESS it’s near the band edge.
Enter immediately after 80% barTimer when Jotun is candy-caning (ranging).
Do not enter when:
Attached Image (click to enlarge)
“Just when I thought I was out they pull me back in.”
Sonny Corleone
Principles
Simply, as soon as a big juicy bar goes up we expect price to retrace at some point to at least ~50% of that bar.
Indicators
BarTimer to measure time left in current bar.
SpikeBars 3.2 (paints the bar after close)
ThrustBars (signals immediately at threshold and paints the candle but will remove the flag if closing price is below the threshold)
Combine Thrust Bar & Spikebar indicators to flag and signal all big bars.
Jotun SMMA
Use TMA envelopes & TMA slope to show where non-prodigals are most likely
Use TMA slope to help you decide when to let some trades run? Not this system.
Add and tune templates for as many instruments/TF as CPU can accommodate. Scan pairs, on M15/H1/H4(?)/D1(?); trade ones that aren’t correlated.
Entry:
Enter immediately after 80% barTimer on any signal that is opposite to what Jotun is flashing UNLESS it’s near the band edge.
Enter immediately after 80% barTimer when Jotun is candy-caning (ranging).
Do not enter when:
- Price is touching the band edge/outside the bands and signal is towards the reversal direction. So if price is above the band, and you get a bearish tall bar, go for a trend-trade instead or ignore.
- The candle is 200-250% taller than the mean average and doesn’t retrace immediately. These are trend signals. (mega-bars)
Exit:
- If the retrace hasn’t happened within X time just cut it loose and go for the next one, there will be no shortage.
- Two tall bars in a row is a trend - exit and reverse and hold til band edge.
- If an adverse excursion hits the wrong side of the band
- When multiple spike bars form (invalidating your retracement trade) you have to ACT FAST to get in heavy with the trend to recover from the drawdown. (often fatal)
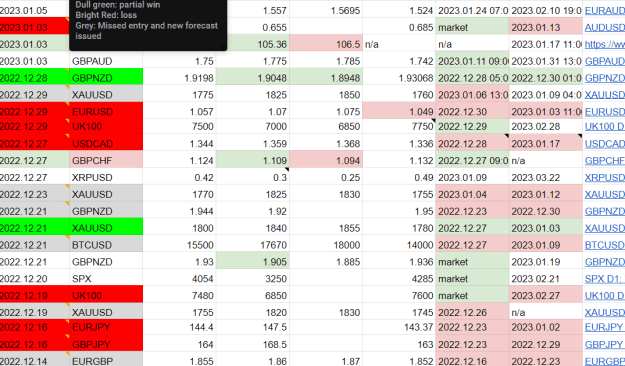
Maximum Wait Expectations for retrace - still anecdotal and instrument-dependent but so far I would say (EURUSD example)
M15 - 10 pip bar - 20 hours
H1 - 20 pip bar - 1 day (24 hours)
H4 - 25 pip bar - 4 days
D1 -125 pip bar - 20 days
If price hasn’t retraced within that time abandon the trade as hopeless.125 may be too tall. 100 looks just fine and provides more trades.
Stop-loss idea - no more than 1 (or 2) non-prodigals of the same direction at any time.