This is the last pair I analyzed following the same format posted in this thread. I then proceeded to try and formalize the rules for COT indicator to make it more practical. The current display is very good, as it really shows every single action taken by the big traders, allowing us to analyze it in a lot of detail, but in our trading it can be a little bit difficult to make a trading decision out of it. Over the course of my work with COT one thing I emphasize is that it is very difficult to use the COT by itself to find trade entries, it is better suited to help us understand the market structure.
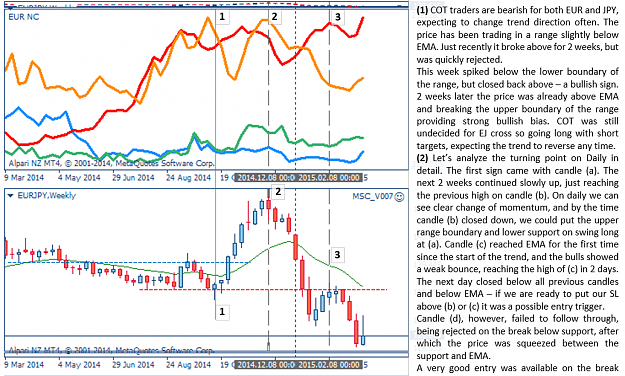
Over the next couple days I will post some of the analysis I was doing that has more to do with price action and trading pairs correlation, as I paused using this COT template for a while. I was and still am using COT in my trading but I came back closer to the basics - we will get to it soon enough.
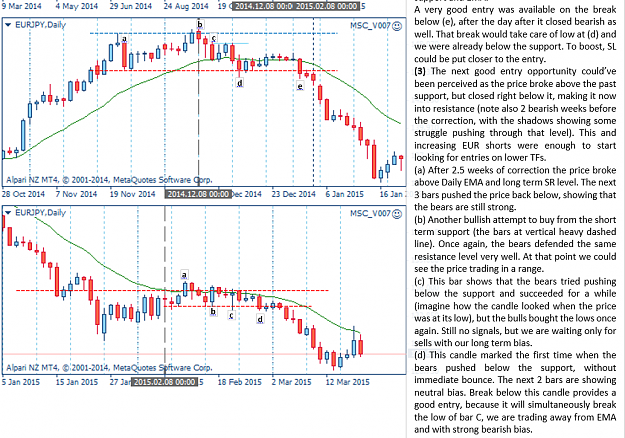
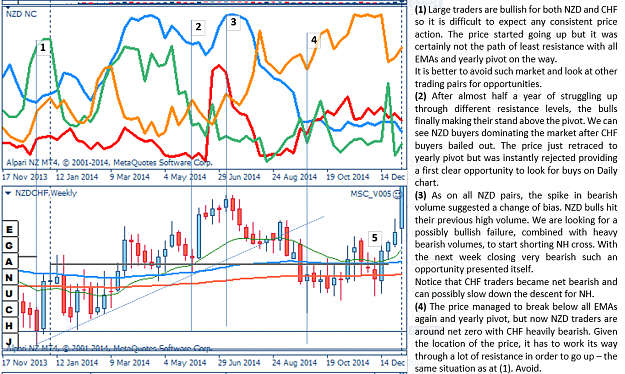
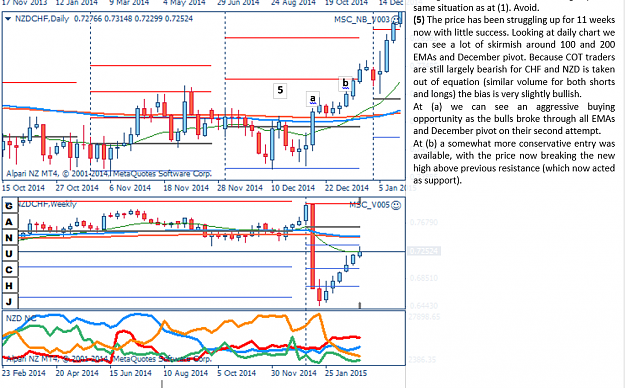
Here is NZDCHF.
Over the next couple days I will post some of the analysis I was doing that has more to do with price action and trading pairs correlation, as I paused using this COT template for a while. I was and still am using COT in my trading but I came back closer to the basics - we will get to it soon enough.
Here is NZDCHF.
Attached Image (click to enlarge)
Attached Image (click to enlarge)
Attached File(s)