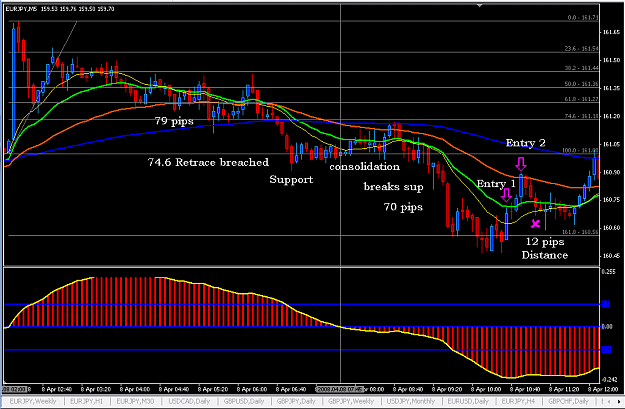
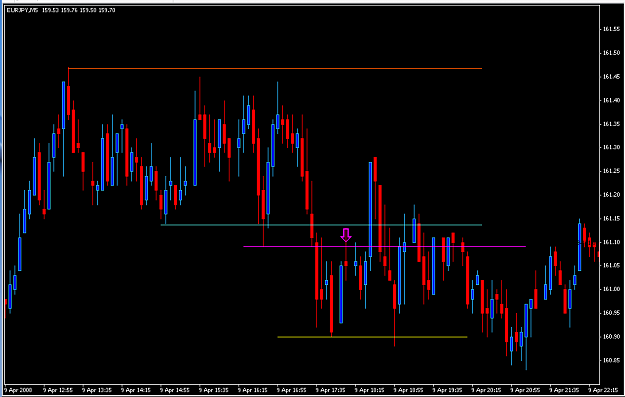
This trade was a little bit harder to define, but by all indication there was all the right ingredients for a trade.
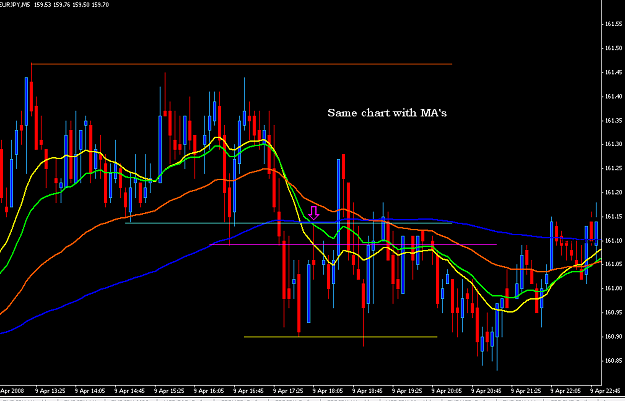
Price topped out wit the big move up at top, then moves down and price crosses under the MA's as the MA's begin crossing under the 144lwma (blue)
This move is less clear, with many small 5min candles along the way, there is still a total move of 72 pips and a support is breaced (teal horiz line) the price finds the next support level and stalls with the retrace going up to tap the 21ema (green) as the indicator reveals a short signal.
I take entry 1 at the 21ema, which is by far a smaller pip retrace, and expect more movement upwards to reach 30 pip retracement at the minimum.
I take entry 2 between the 50ema and 144lwma for a SHORT, and now average my buy in a little higher with expectation of a move downward towards the support just achieved. I prefer a 10 pip drawdown before going in on a second and third entry.
Price taps near the 144 and makes a move back towards the support area, one important factor which I will consider is taking profits at the +9/10 area on a move and also exiting a majority of my lots before the 10pips distance of a high/low area.
As you see, price made it's move down to test the low and fell short a few pips then finally made to to the bottom and bounced up and beyond the entry 2 I took earlier.
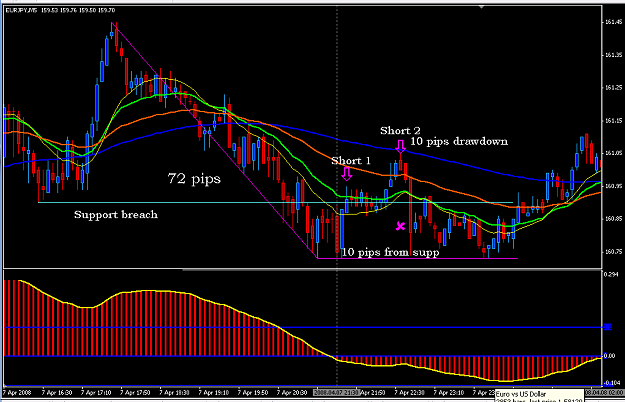
Attached Image (click to enlarge)