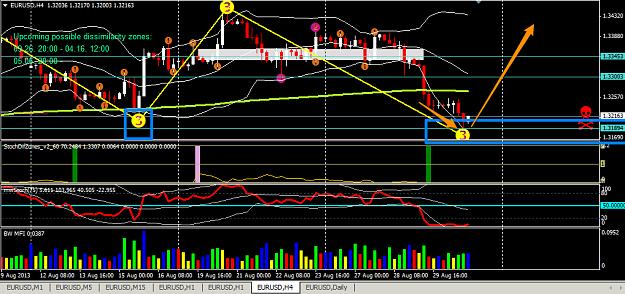
Dissimilarity Zones
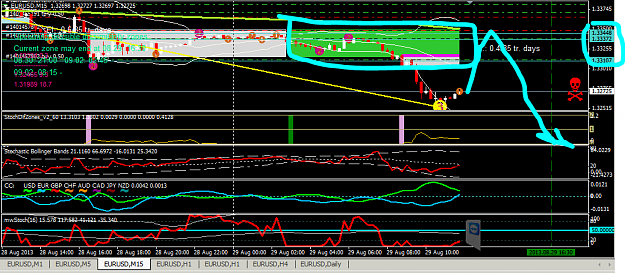
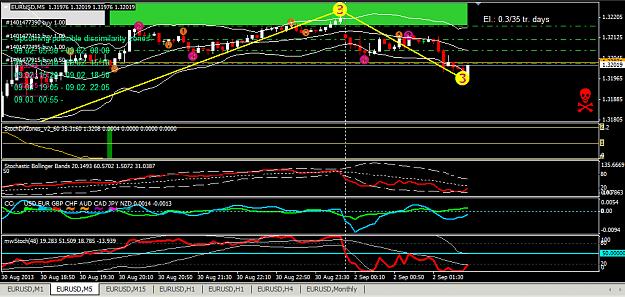
The 15M shows an unborn Zone under the 300EMA. This means that if the 300EMA is tested and FAILS AND the Dissimilarity Ends then price will be above the born zone and it's a pretty big one. It will attract price and could suck price down to 1.33107
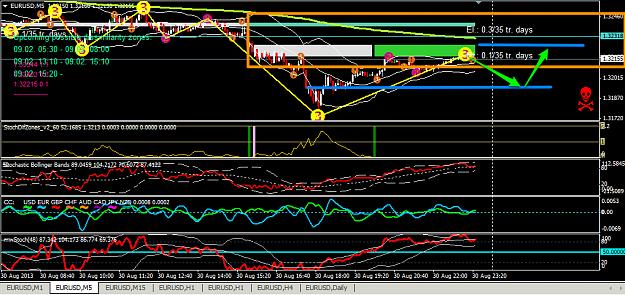
The 5M shows a born zone which has much more gravitas over the unborn zone. 1.33158 is the price of the lower boundary.
Price could go higher and *3* semafor repaints for a ZZTop touching 300EMA. A failure of the 300EMA could then push price south and produce a *3* ZZBottom
Otherwise, if the zone is cleared BEFORE a challenge of 300EMA then that will align with the 15M timeframe, which is a scenario I would prefer.
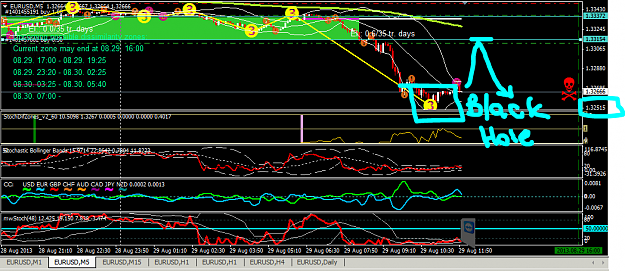
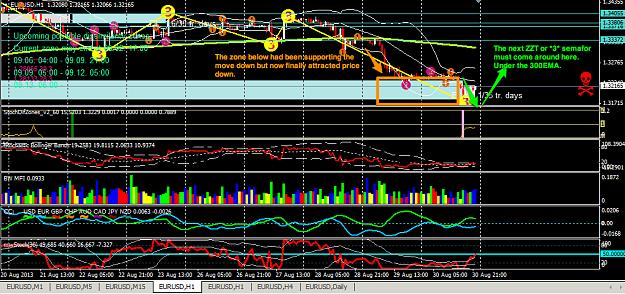
The 15M shows an unborn Zone under the 300EMA. This means that if the 300EMA is tested and FAILS AND the Dissimilarity Ends then price will be above the born zone and it's a pretty big one. It will attract price and could suck price down to 1.33107
The 5M shows a born zone which has much more gravitas over the unborn zone. 1.33158 is the price of the lower boundary.
Price could go higher and *3* semafor repaints for a ZZTop touching 300EMA. A failure of the 300EMA could then push price south and produce a *3* ZZBottom
Otherwise, if the zone is cleared BEFORE a challenge of 300EMA then that will align with the 15M timeframe, which is a scenario I would prefer.
Attached Image(s) (click to enlarge)

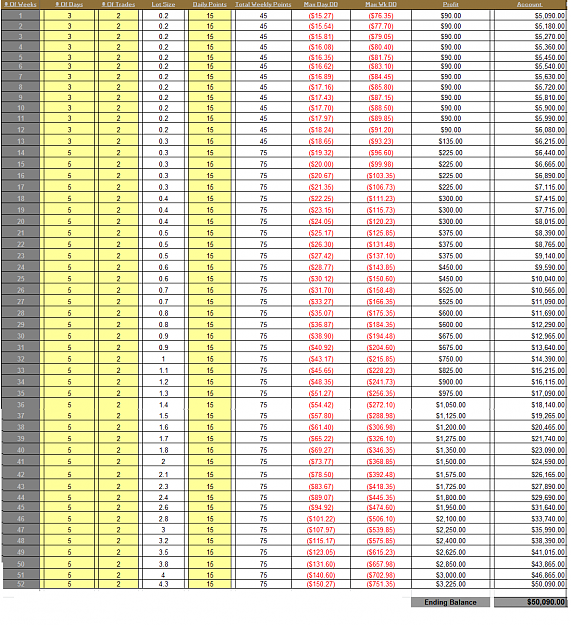
A pip is only worth it if you know how much you risked to earn it