GBPCAD, H1, 2011 November 13
Trade Example
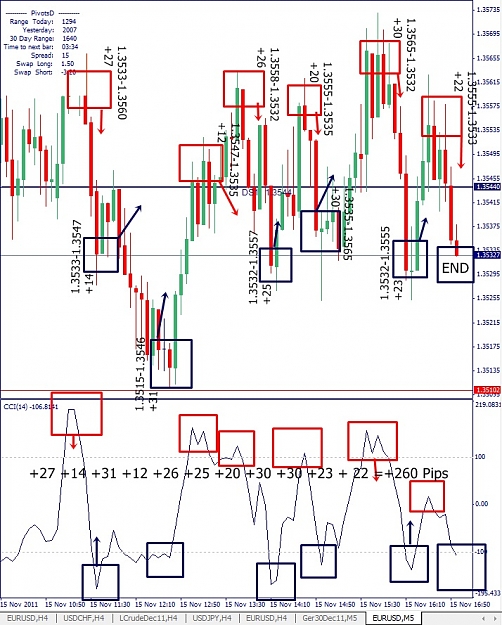
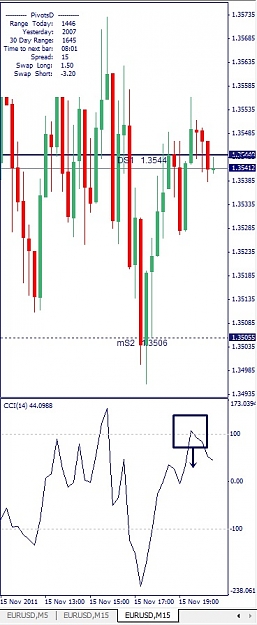
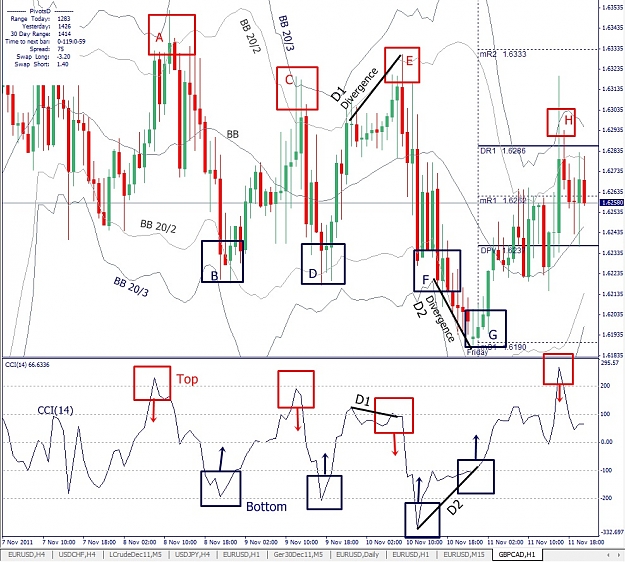
CCI(14) Top & Bottom Trading with the Bollinger Bands, the Divergence and the Pivotal Points
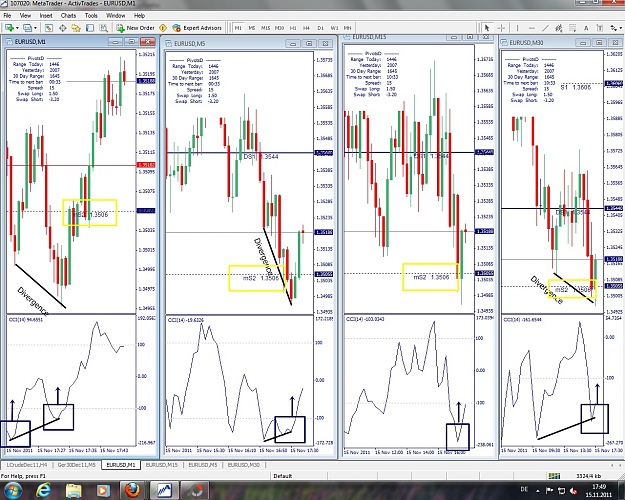
Trading the CCI(14) Top & Bottom in close contact with the Bollinger Bands and/or Divergence and/or the Pivotal Points could be easy and efficient.
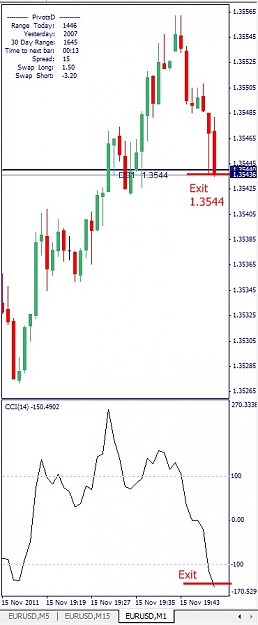
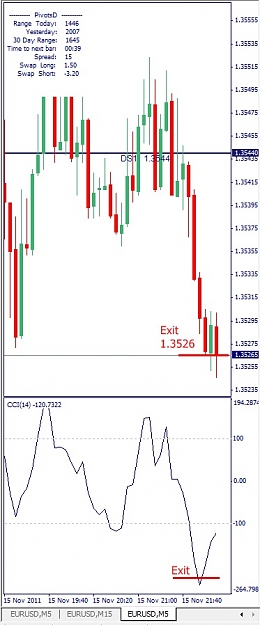
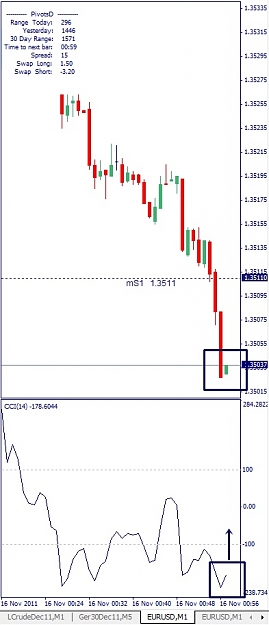
Preferred Trades: A (Short), B (Exit & Long), C (Exit & Short), D (Exit & Long), D1 (Exit & Short), E (Short), F (Exit & Long), G (Long), H (Exit).
No trades anymore because it's Friday evening (GMT +1).
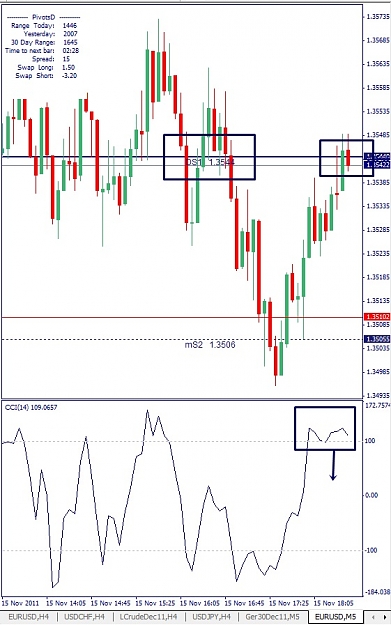
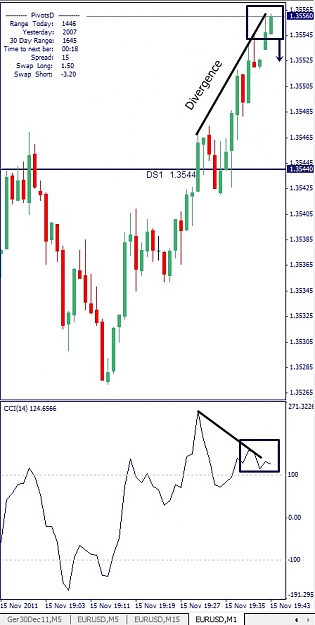
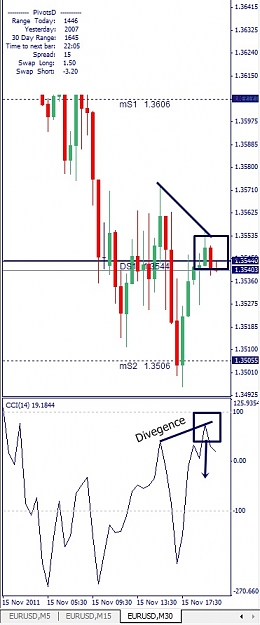
Divergences: At Divergence Market Environments you could also take a Double Short (D1 & E) and a Long twice (F & G).
Once again:
When I see Divergences near the Pivotal Points I go in the market with one more Order most of the time.
Example: Divergence 1/ D1 Short & E Short and Divergence 2/ F Long & G Long.
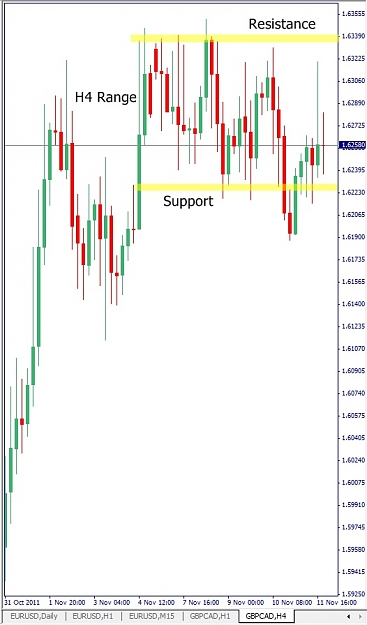
When Daily and H4 Candles seems moving in a Range (see #46, please) it could be an excellent market environment for the H1 Trading with the CCI(14) Tops- and Bottom Trading associated with the Bollinger Bands (20/2 and 20/3). (20/2 means "Period": 20, "Deviations": 2, "Shift": 0, "Apply to": Close).
The Money Management could be 10% for every trade of e.g. a normal Trade Sizes (0.1/1 Lot or so). So I am in the market at Divergence Market Environments with two Orders (20% of the Maxima). The reason why I trade with one-tenth most of the time is that I can go in the market with more orders at different time-frames and at different currency-pairs and reduce my risk in so doing.
Kindest regards
FXcube
___
Template: See attachment, please.
Trade Example
CCI(14) Top & Bottom Trading with the Bollinger Bands, the Divergence and the Pivotal Points
Trading the CCI(14) Top & Bottom in close contact with the Bollinger Bands and/or Divergence and/or the Pivotal Points could be easy and efficient.
Preferred Trades: A (Short), B (Exit & Long), C (Exit & Short), D (Exit & Long), D1 (Exit & Short), E (Short), F (Exit & Long), G (Long), H (Exit).
No trades anymore because it's Friday evening (GMT +1).
Divergences: At Divergence Market Environments you could also take a Double Short (D1 & E) and a Long twice (F & G).
Once again:
When I see Divergences near the Pivotal Points I go in the market with one more Order most of the time.
Example: Divergence 1/ D1 Short & E Short and Divergence 2/ F Long & G Long.
When Daily and H4 Candles seems moving in a Range (see #46, please) it could be an excellent market environment for the H1 Trading with the CCI(14) Tops- and Bottom Trading associated with the Bollinger Bands (20/2 and 20/3). (20/2 means "Period": 20, "Deviations": 2, "Shift": 0, "Apply to": Close).
The Money Management could be 10% for every trade of e.g. a normal Trade Sizes (0.1/1 Lot or so). So I am in the market at Divergence Market Environments with two Orders (20% of the Maxima). The reason why I trade with one-tenth most of the time is that I can go in the market with more orders at different time-frames and at different currency-pairs and reduce my risk in so doing.
Kindest regards
FXcube
___
Template: See attachment, please.
Attached Image (click to enlarge)
Attached File(s)