Welcome!
Seasoned trader here with a strategy you'll surely want to take a look at. At it's core, its a price action strategy that doesn't require ANY indicators!
In this thread you'll learn that I subscribe to a particular philosophy; MOST indicators are bullshit
Only once you have come to this conclusion yourself should you continue to read about the strategy and all the goodness it has to offer.
I'm not going to waste any of our time explaining every nuanced detail of the concepts I list. If there's a basic premise that you don't understand, please take the time to research it.
_________________________________________________________________________________________________________________________
At the core of every trade will have these three concepts, which I will give a brief explanation of here.
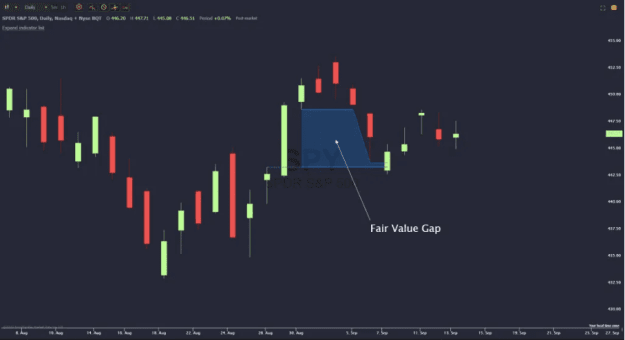
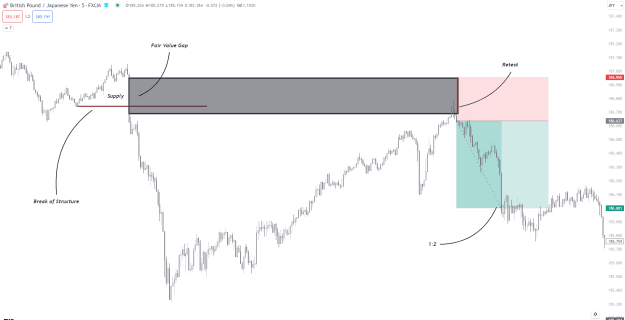
Fair Value Gap - A fair value gap appears in a triple-candle pattern when there is a large candle whose previous candle’s high and subsequent candle’s low do not fully overlap the large candle. The space between these wicks is known as the fair value gap
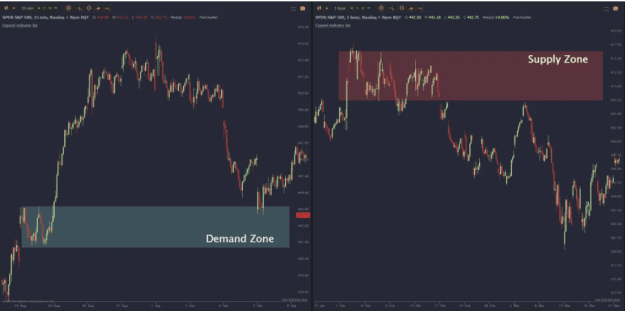
Supply and Demand - Identifying supply and demand zones is important because they can indicate potential areas of support or resistance. When the price reaches a supply zone, it may struggle to move higher and could potentially reverse. Similarly, when the price reaches a demand zone, it may struggle to move lower and could potentially reverse.
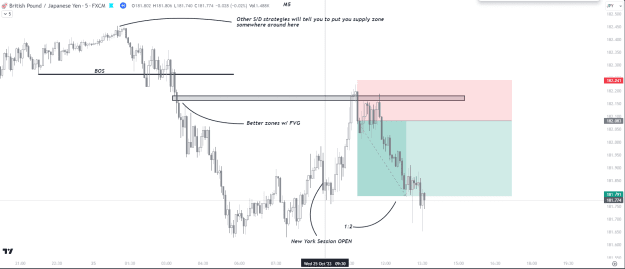
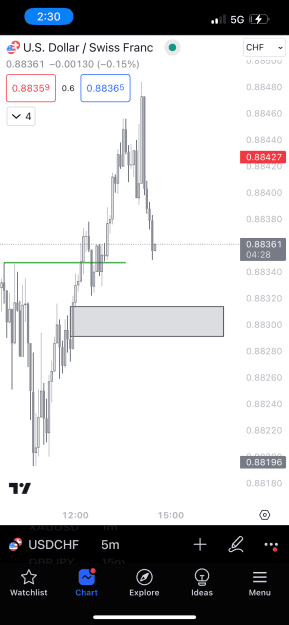
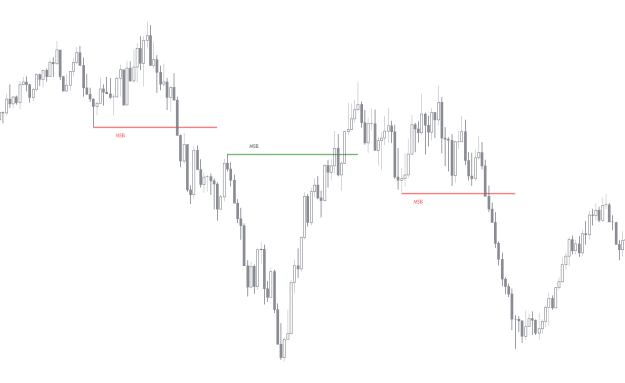
Break Of Structure - BOS occurs after the breakout of the old high and when the price makes lower lows, or occurs after the breakout of the old low and when the price make higher highs.
_________________________________________________________________________________________________________________________
Long Entry:
1) Identify a demand zone.
2) Identify a FVG after price as aggressively moved away from the demand zone. Make sure it's at the beginning of the move.
3) Identify that the demand zone has created a break of structure.
4) Wait for price to come back to demand zone, tapping into the liquidity.
5) If price has not breached the demand zone (optional), take a long position.
6) (optional) When starting you can use the bottom of the demand zone for stop loss, and target 1:2. As you advance, it's better to not use arbitrary RR and rather target specific market structure.
7) (optional) Trade during NY Session and preferably before 12 for the easiest trades
Inverse For Shorts
_________________________________________________________________________________________________________________________
Advanced Theories
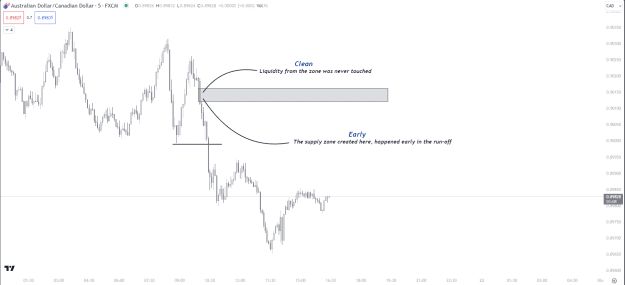
"Clean" - After the supply or demand zone was created during the run, if price NEVER came back to touch that zone, this creates a "clean" zone where price is more likely to react aggressively
"Dirty" - After the supply or demand zone was created during the run, if price DID came back to touch that zone, this creates a "dirty" zone where price is less likely to react aggressively
"Early" - The FVG that creates our supply or demand zone can come at different times during the run. Typically, the earlier in the run the zone is created, the larger the reversal is after touching it.
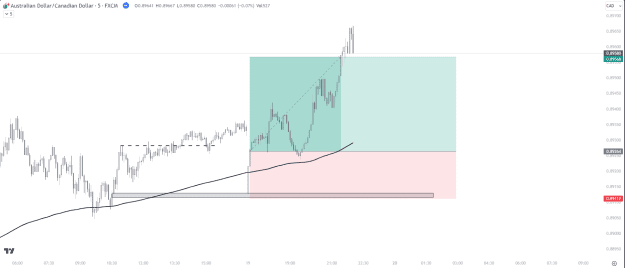
200EMA - Optional indicator that traders can use to get a quick understanding of which direction the market is moving. Take demand setups when price is above the 200 EMA, and supply setups when price is below it. (This is used for convenience and nothing more. 100% not needed)
_________________________________________________________________________________________________________________________
This exact strategy has created many profitable traders. However, I'm a curious soul and I know there's many great minds on ForexFactory. I'm looking forward to any and all contributions.
Seasoned trader here with a strategy you'll surely want to take a look at. At it's core, its a price action strategy that doesn't require ANY indicators!
In this thread you'll learn that I subscribe to a particular philosophy; MOST indicators are bullshit
Only once you have come to this conclusion yourself should you continue to read about the strategy and all the goodness it has to offer.
I'm not going to waste any of our time explaining every nuanced detail of the concepts I list. If there's a basic premise that you don't understand, please take the time to research it.
_________________________________________________________________________________________________________________________
At the core of every trade will have these three concepts, which I will give a brief explanation of here.
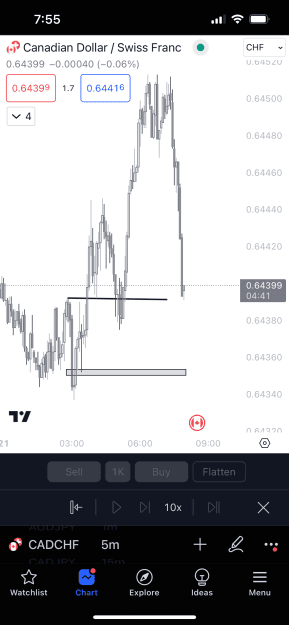
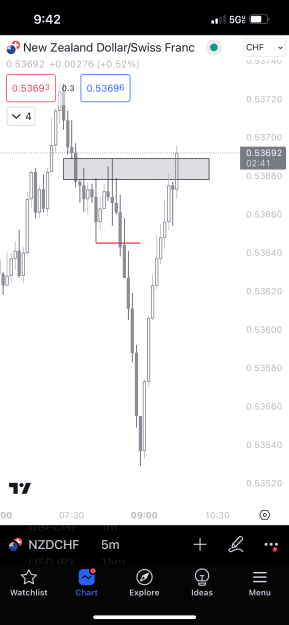
Fair Value Gap - A fair value gap appears in a triple-candle pattern when there is a large candle whose previous candle’s high and subsequent candle’s low do not fully overlap the large candle. The space between these wicks is known as the fair value gap
Attached Image (click to enlarge)
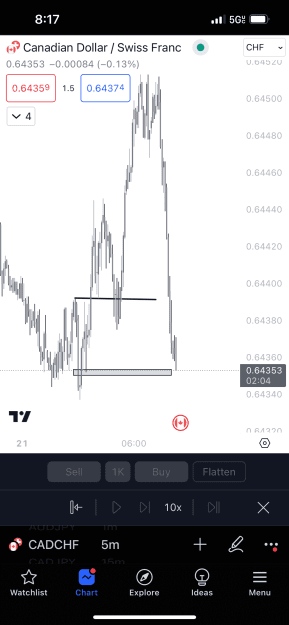
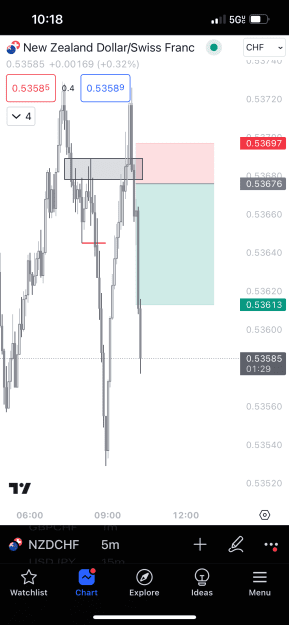
Supply and Demand - Identifying supply and demand zones is important because they can indicate potential areas of support or resistance. When the price reaches a supply zone, it may struggle to move higher and could potentially reverse. Similarly, when the price reaches a demand zone, it may struggle to move lower and could potentially reverse.
Attached Image (click to enlarge)
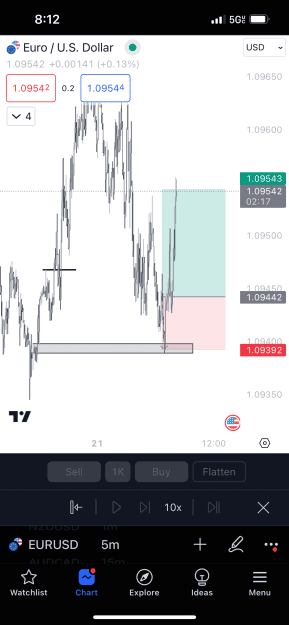
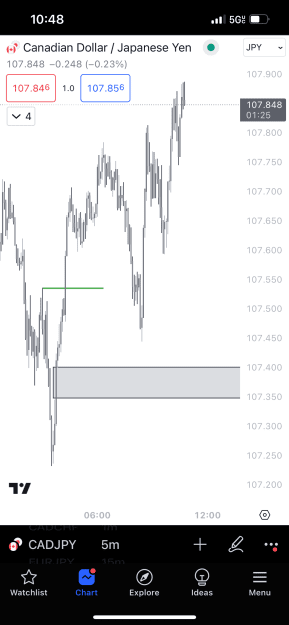
Break Of Structure - BOS occurs after the breakout of the old high and when the price makes lower lows, or occurs after the breakout of the old low and when the price make higher highs.
Attached Image (click to enlarge)
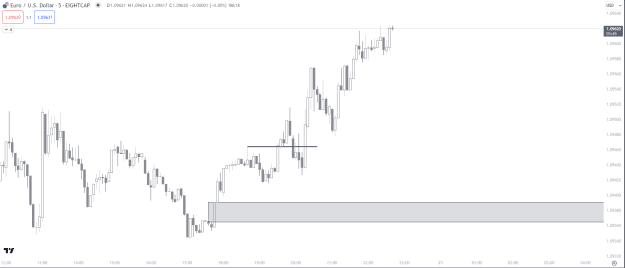
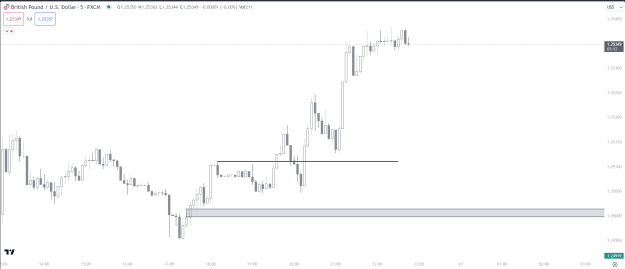
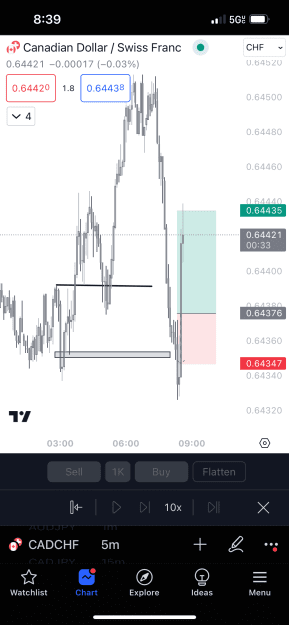
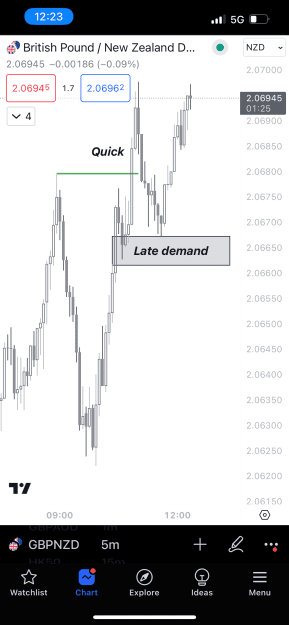
Long Entry:
1) Identify a demand zone.
2) Identify a FVG after price as aggressively moved away from the demand zone. Make sure it's at the beginning of the move.
3) Identify that the demand zone has created a break of structure.
4) Wait for price to come back to demand zone, tapping into the liquidity.
5) If price has not breached the demand zone (optional), take a long position.
6) (optional) When starting you can use the bottom of the demand zone for stop loss, and target 1:2. As you advance, it's better to not use arbitrary RR and rather target specific market structure.
7) (optional) Trade during NY Session and preferably before 12 for the easiest trades
Inverse For Shorts
Attached Image (click to enlarge)
_________________________________________________________________________________________________________________________
Advanced Theories
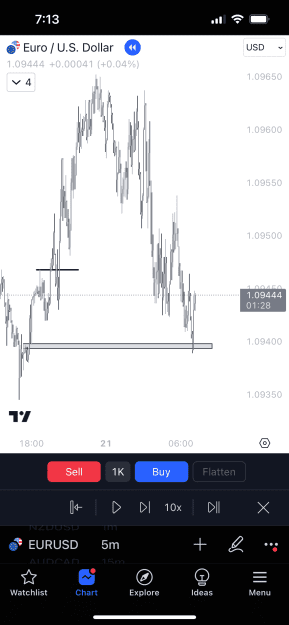
"Clean" - After the supply or demand zone was created during the run, if price NEVER came back to touch that zone, this creates a "clean" zone where price is more likely to react aggressively
"Dirty" - After the supply or demand zone was created during the run, if price DID came back to touch that zone, this creates a "dirty" zone where price is less likely to react aggressively
"Early" - The FVG that creates our supply or demand zone can come at different times during the run. Typically, the earlier in the run the zone is created, the larger the reversal is after touching it.
Attached Image (click to enlarge)
200EMA - Optional indicator that traders can use to get a quick understanding of which direction the market is moving. Take demand setups when price is above the 200 EMA, and supply setups when price is below it. (This is used for convenience and nothing more. 100% not needed)
Attached Image (click to enlarge)
_________________________________________________________________________________________________________________________
This exact strategy has created many profitable traders. However, I'm a curious soul and I know there's many great minds on ForexFactory. I'm looking forward to any and all contributions.