Disclaimer: This isn't totally my original idea, I just refined it to my own liking and thought of sharing. Original thread can be found here: https://www.forexfactory.com/thread/...e-and-powerful
I'm still experimenting this system and I was hoping that members have insightful contributions to improve upon it together. I hope there won't be a need for more indicators, as well as the need to filter on a higher TF, but, you can add them if you like.
This system is a very slow system, each pair may only produce a couple of valid setups a month. But with all the pairs, we may get more.
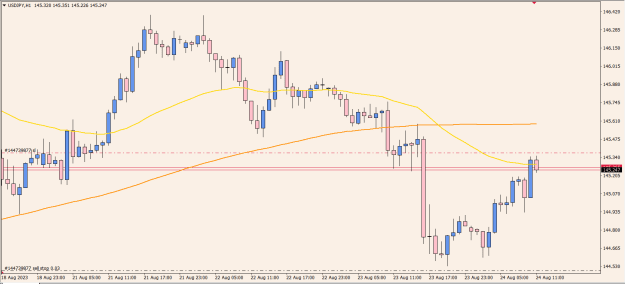
Indicators: Exponential Moving Average 50 & Simple Moving Average 200. Both apply to Close and 0 Shift.
Fibonacci retracement tool with levels: 0, 50.0, 100.0, 161.8, 188, 200, 261.8, 341.1 and 423.6.
Timeframe: H1
Best pairs (so far): AUDUSD, GBPJPY and XAUUSD.
Setup:
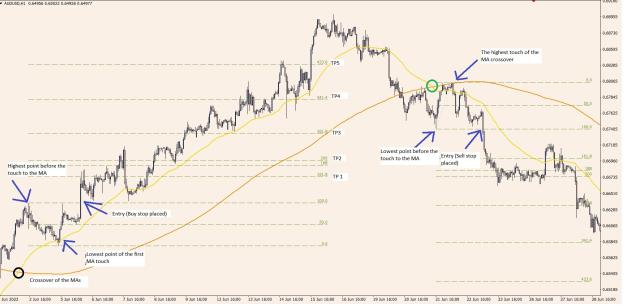
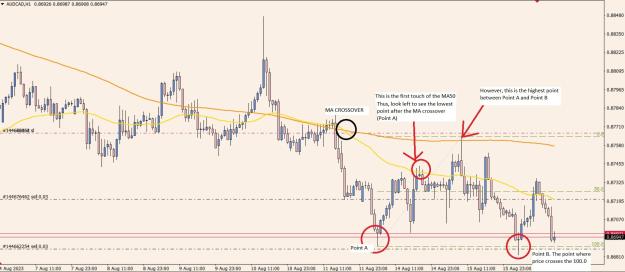
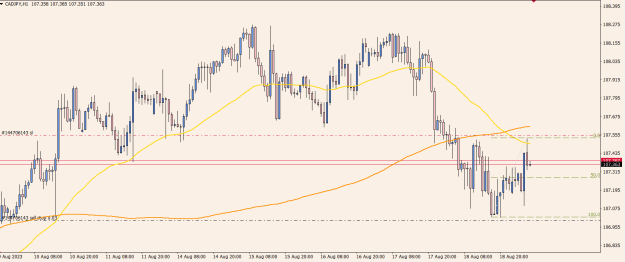
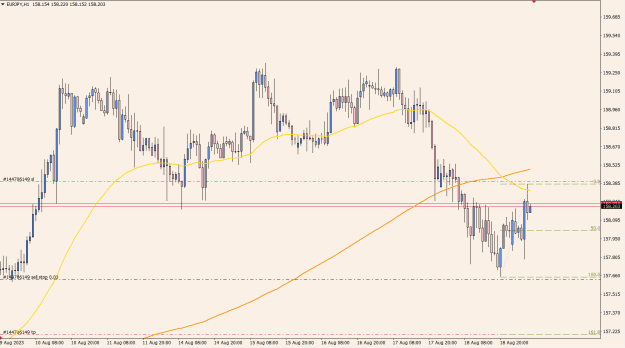
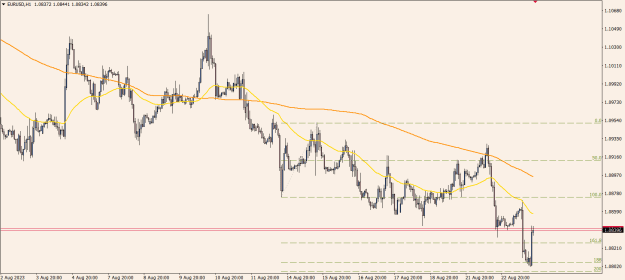
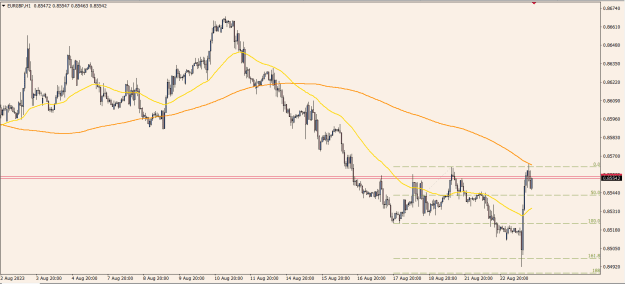
1. Wait for indicator lines to cross.
2. Wait for price to touch EMA50 after the cross (the first touch). The wick can also touch SMA200. But the candle CANNOT close beyond the SMA200. There is no setup the moment you see the candle closing beyond the SMA200.
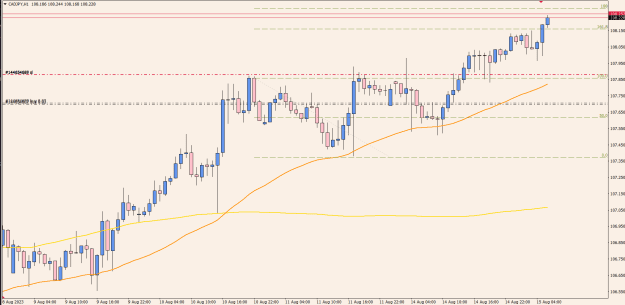
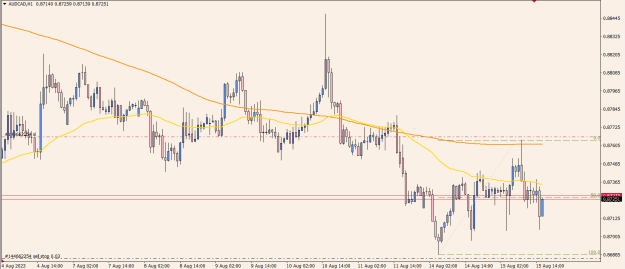
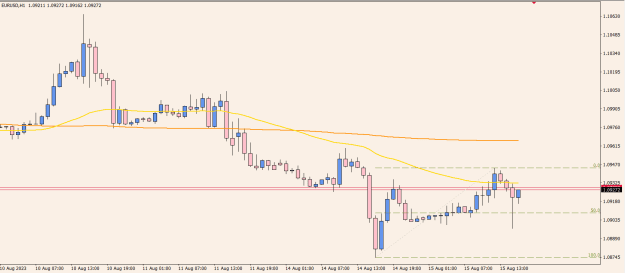
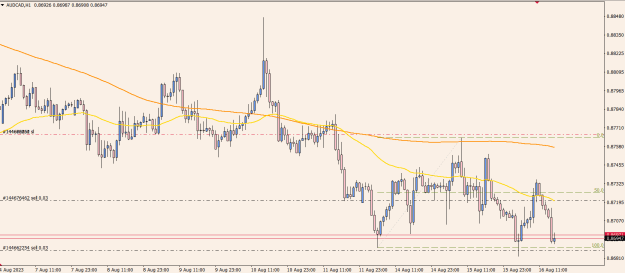
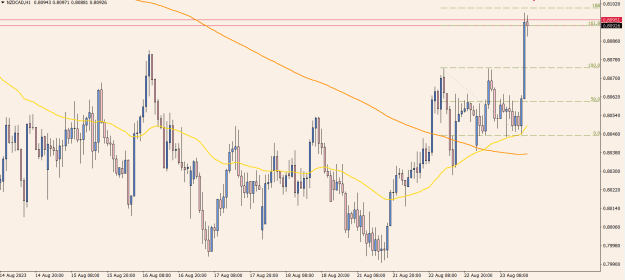
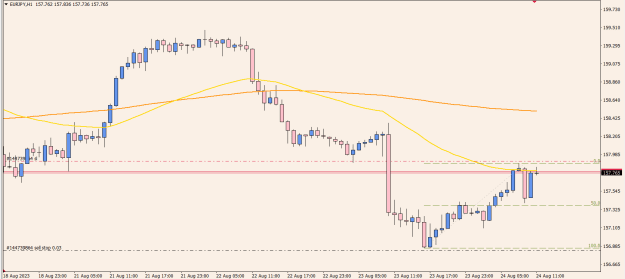
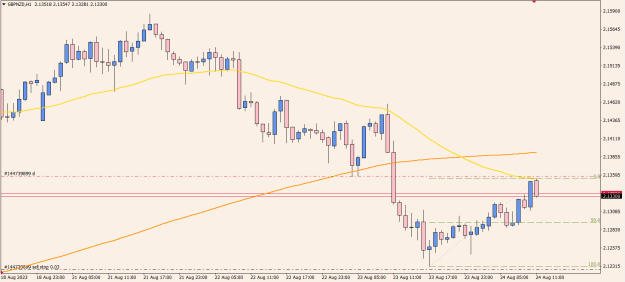
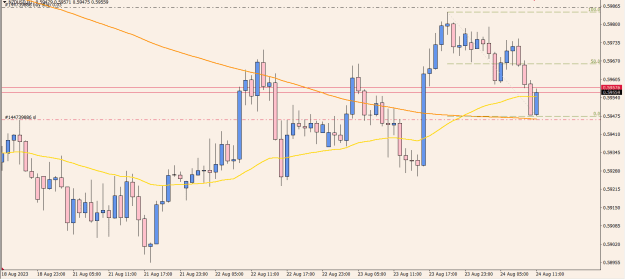
3. Pull a fib retracement from left to right. This determines our entry, SL and TP levels. For buy, pull from the highest point, to the lowest point of the retracement. For sell, pull from the lowest point, to the highest point of the retracement (Refer to screenshots below).
Entry:
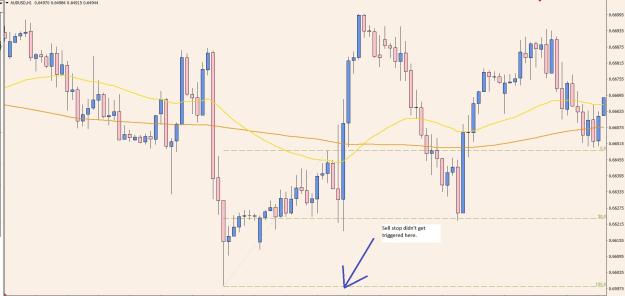
1. Place a buy stop/ sell stop at 100 level.
2. SL is below/ above 0.
3. The first and most important TP is at 161.8. I suggest you place a BE as soon as price hit this level, but this is up to you. Use the other levels to let your trade/ part of your trade run and hit them. (Now, I know with this logic, your SL is bigger than your TP. But the winrate by placing the TP at 161.8 is quite high from my backtest. This is why we let trades run after placing BE to the 200, 261.8 and 423.6 levels to increase our winnings.)
You can also enter around the 50.0 level if it retraced back to that level before price hits 161.8. This way, the R:R is improved.
Exit/ Invalidated setups:
1. When either the TP, SL or BE is hit, your trade is over and you look for a fresh setup.
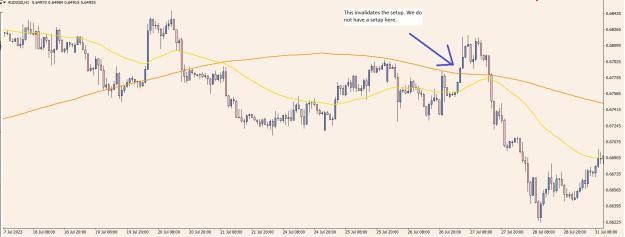
2. When the price closes on the other side of the SMA200, your setup is invalidated.
3. When the EMA & SMA lines cross again, your setup is invalidated. A crossover of the MA lines means you must start afresh.
Appreciate input from the community. Let's keep this thread respectful and clean.
I'm still experimenting this system and I was hoping that members have insightful contributions to improve upon it together. I hope there won't be a need for more indicators, as well as the need to filter on a higher TF, but, you can add them if you like.
This system is a very slow system, each pair may only produce a couple of valid setups a month. But with all the pairs, we may get more.
Indicators: Exponential Moving Average 50 & Simple Moving Average 200. Both apply to Close and 0 Shift.
Fibonacci retracement tool with levels: 0, 50.0, 100.0, 161.8, 188, 200, 261.8, 341.1 and 423.6.
Timeframe: H1
Best pairs (so far): AUDUSD, GBPJPY and XAUUSD.
Setup:
1. Wait for indicator lines to cross.
2. Wait for price to touch EMA50 after the cross (the first touch). The wick can also touch SMA200. But the candle CANNOT close beyond the SMA200. There is no setup the moment you see the candle closing beyond the SMA200.
3. Pull a fib retracement from left to right. This determines our entry, SL and TP levels. For buy, pull from the highest point, to the lowest point of the retracement. For sell, pull from the lowest point, to the highest point of the retracement (Refer to screenshots below).
Entry:
1. Place a buy stop/ sell stop at 100 level.
2. SL is below/ above 0.
3. The first and most important TP is at 161.8. I suggest you place a BE as soon as price hit this level, but this is up to you. Use the other levels to let your trade/ part of your trade run and hit them. (Now, I know with this logic, your SL is bigger than your TP. But the winrate by placing the TP at 161.8 is quite high from my backtest. This is why we let trades run after placing BE to the 200, 261.8 and 423.6 levels to increase our winnings.)
You can also enter around the 50.0 level if it retraced back to that level before price hits 161.8. This way, the R:R is improved.
Exit/ Invalidated setups:
1. When either the TP, SL or BE is hit, your trade is over and you look for a fresh setup.
2. When the price closes on the other side of the SMA200, your setup is invalidated.
3. When the EMA & SMA lines cross again, your setup is invalidated. A crossover of the MA lines means you must start afresh.
Appreciate input from the community. Let's keep this thread respectful and clean.
Attached Image(s) (click to enlarge)