Thanks everyone for your messages/comments in this thread! Here's a quick update.
As planned, I just updated the first post of this thread with new content about "Entry, take profit and stop loss", I think you will like it! You can also read it at the bottom of this post.
As always, let me know if you have any questions.
---
Entry, take profit and stop loss
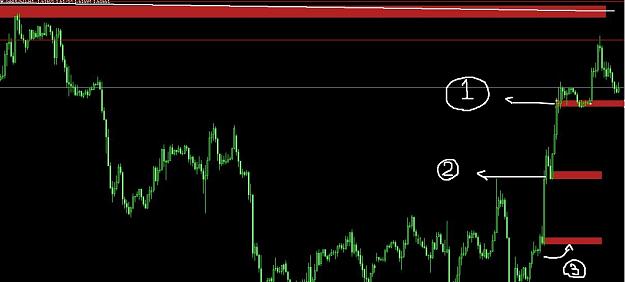
Once you identify a good level that you want to trade, you have to set up the trade. Here's how I do it with a little example, based on the first chart of this thread.
Legend:
- Blue rectangle: the supply level
- Blue line: the entry of the trade, at the beginning of the level
- Red line: the stop loss (SL), usually a few pipes above the end of the level
- Green line: the take profit (TP), that is simply placed in a way to have a 1:2 or 1:3 risk:reward ratio (in this example it's a 1:3)
So once you know how to draw levels, setting up a trade is really simple with these rules.
As planned, I just updated the first post of this thread with new content about "Entry, take profit and stop loss", I think you will like it! You can also read it at the bottom of this post.
As always, let me know if you have any questions.
---
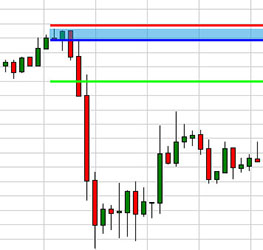
Entry, take profit and stop loss
Once you identify a good level that you want to trade, you have to set up the trade. Here's how I do it with a little example, based on the first chart of this thread.
Attached Image
Legend:
- Blue rectangle: the supply level
- Blue line: the entry of the trade, at the beginning of the level
- Red line: the stop loss (SL), usually a few pipes above the end of the level
- Green line: the take profit (TP), that is simply placed in a way to have a 1:2 or 1:3 risk:reward ratio (in this example it's a 1:3)
So once you know how to draw levels, setting up a trade is really simple with these rules.