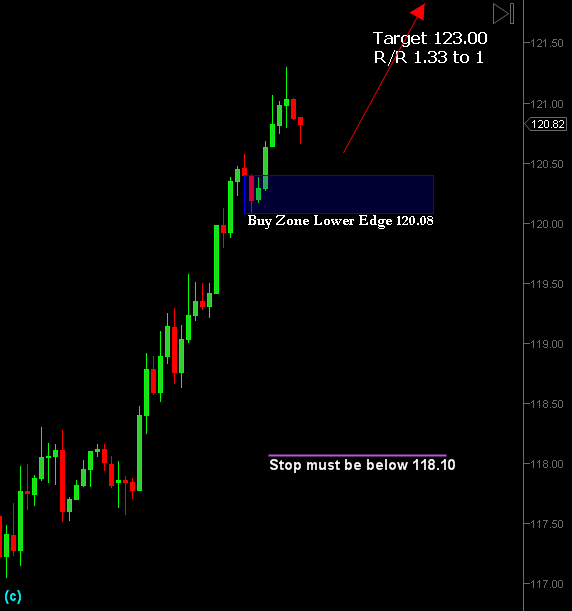
OK... Here's a better chart than the quick one posted on the breakout....
This is a risky trade with poor R/R parameters... but you have to factor in the intervention going in the trade's direction. Nonetheless, caution is advised.
The stop is far away, so size the position to risk whatever normal percentage of account balance you trade. I'll post the stop tightening as soon as it is possible.... To start, we have to put the stop below where PA would destroy the analysis... as the chart unfolds a new place higher will become that place, and I'll move the stop then.
The USDJPY chart is nearly identical, extrapolate from here... If you take positions on both pairs, you are doubling your total position size as these two pairs are nearly perfectly correlated.
BOJ can pull there intervention at any time... there is no such thing as a one trade that lasts forever... size your position appropriately....
Attached Image